Ordering a replacement window without precise measurements is like cutting lumber without a tape measure, you’re asking for trouble. A window that’s even a quarter-inch off can leave gaps that waste energy, let in water, or require expensive custom fabrication. Whether a homeowner is upgrading to energy-efficient units or replacing a broken sash, knowing how to measure a replacement window correctly is the difference between a smooth installation and a costly headache. This guide walks through the exact process, tools, and techniques needed to capture accurate dimensions the first time.
Table of Contents
ToggleKey Takeaways
- Accurate window measurements must be taken at three points (top, middle, bottom) for both width and height, always using the smallest dimension to ensure proper fit without forcing the frame.
- How to measure a window for replacement requires capturing width (jamb-to-jamb), height (sill-to-head jamb), and depth (interior-to-exterior face) to prevent installation delays and costly custom fabrication.
- Common measurement mistakes like rounding up, measuring the sash instead of the frame, or forgetting depth verification are the leading causes of windows that won’t fit or meet building codes.
- Inspect the exterior before ordering to identify rotted sills, damaged flashing, or brick mold issues that must be repaired before replacement window installation begins.
- For bedroom egress windows, verify the replacement unit meets the IRC minimum of 5.7 square feet openable area, 24 inches high, and 20 inches wide to ensure code compliance and avoid inspection failures.
Why Accurate Window Measurements Matter
Window manufacturers build replacement units to tight tolerances, typically within 1/8 inch, because the opening’s exact dimensions dictate fit, weatherproofing, and structural integrity. An undersized window creates gaps that no amount of expanding foam can properly seal, leading to air infiltration and moisture intrusion. An oversized unit won’t fit the rough opening at all, forcing costly reframing or returns that delay the project by weeks.
Most replacement windows are insert replacements (also called pocket replacements), which fit inside the existing frame after removing the old sash. This method preserves interior and exterior trim but requires measuring the existing frame opening, not the original rough opening in the wall. Full-frame replacements, by contrast, remove the entire window unit down to the framing, and those measurements include the rough opening width and height between studs and header.
Building codes don’t typically regulate measuring techniques, but they do set standards for egress window sizes in bedrooms (minimum 5.7 square feet of openable area per IRC Section R310) and energy performance. Incorrect measurements can result in windows that don’t meet code, fail inspections, or underperform thermally. Getting it right the first time also avoids restocking fees, which many suppliers charge for custom or non-standard sizes.
Tools You’ll Need to Measure Your Windows
Accurate measurements don’t require a contractor’s full kit, but using the right tools makes the process faster and more reliable. Here’s what to have on hand:
- 25-foot tape measure with a locking blade and 1/16-inch graduations (avoid cloth or flimsy tapes that sag or stretch)
- Pen and paper or a smartphone with a note app to record each dimension immediately
- Flashlight or headlamp to inspect dark frame cavities and reveal hidden damage
- Level (2- or 4-foot) to check for plumb and square, especially on older homes
- Utility knife to carefully remove interior stops or trim if measuring the rough opening
- Safety glasses to protect eyes from paint chips, dust, or debris when working around old frames
Some pros also use a laser measure for speed, but a quality tape is more versatile and reliable in tight spots or when measuring depth. If the window is on a second story or higher, a sturdy ladder and a helper are essential, never lean out from inside to measure exterior dimensions.
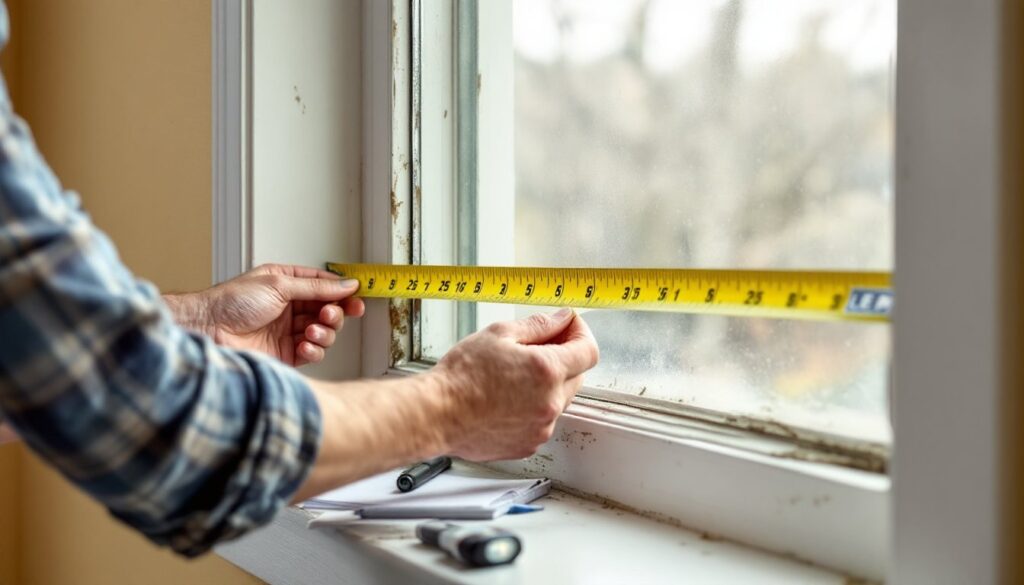
How to Measure Width: Getting the Horizontal Dimensions Right
Width is measured horizontally from inside jamb to inside jamb, the vertical sides of the window frame. For insert replacements, measure at three points: top, middle, and bottom. Windows settle, sag, and shift over time, so these measurements often differ.
- Measure the top width: Hook the tape at the left inside jamb and extend it to the right inside jamb, recording to the nearest 1/16 inch. Keep the tape parallel to the sill to avoid diagonal errors.
- Measure the middle width: Repeat at the vertical center of the frame.
- Measure the bottom width: Measure along the sill, just above where it meets the interior stop.
Always use the smallest of the three measurements when ordering. Manufacturers typically deduct 1/4 inch from this dimension to ensure the new unit fits without forcing, which can bow the frame and break seals. For example, if the measurements are 35 1/4″, 35 3/8″, and 35 1/2″, order the window based on 35 1/4″ (manufacturer will size it at 35″ actual).
For full-frame replacements, measure the rough opening between the king studs (the full-height vertical framing members). This requires removing interior trim or drywall to expose the framing. Rough openings are typically 1/2 inch wider than the window unit to allow for shimming and leveling. Many home improvement professionals recommend verifying rough opening dimensions before ordering, especially in older homes where framing may not be square.
How to Measure Height: Capturing the Vertical Dimensions
Height follows the same three-point method as width, but measured vertically from the sill (bottom horizontal surface) to the head jamb (top horizontal surface). Gravity and settling cause more variation in height than width, especially in wood-framed homes.
- Measure the left height: Hook the tape at the sill and extend it up to the underside of the head jamb on the left side. Record to 1/16 inch.
- Measure the center height: Repeat at the middle of the window.
- Measure the right height: Measure at the right side.
Again, use the smallest measurement to ensure clearance. If the sill is sloped for drainage (common on exterior sills), measure to the highest point where the replacement unit will sit. Ignore any protruding interior stool (the decorative shelf below the sash), measure only the structural opening.
For egress windows in bedrooms, verify that the replacement unit’s openable area meets the 5.7 square feet minimum and that the opening is at least 24 inches high and 20 inches wide (per IRC R310.2.1). Double-hung and casement windows often meet this easily, but sliders and awning windows may not. According to guidance found on sites like Bob Vila, homeowners replacing bedroom windows should confirm code compliance before ordering to avoid inspection failures.
Measuring Window Depth and Frame Details
Depth, also called sill depth or frame depth, is the distance from the interior face of the window frame to the exterior face. This measurement determines whether the replacement unit will fit the wall thickness and whether extension jambs are needed.
Measure from the inside edge of the interior jamb straight back to the exterior jamb or blind stop (the exterior trim piece that holds the sash in place). Typical depths range from 3 inches in older homes with true 2×4 walls to 6+ inches in walls with 2×6 studs or added insulation. If the depth is greater than the replacement window’s frame, extension jambs, thin wood or vinyl strips, fill the gap.
Also note these frame details:
- Sill angle: Most exterior sills slope 5–15 degrees for water runoff. Replacement units must accommodate this or require shimming.
- Brick mold or casing: If present, measure its width. Some replacement windows include exterior trim: others require separate installation.
- Interior and exterior stops: These small moldings hold the sash in place. For insert replacements, the interior stops are typically removed and reinstalled after the new unit is set.
If the home has unusual wall construction, stone, stucco, log, or structural insulated panels, consult the window manufacturer’s installation guide. Non-standard depths often require custom jamb extensions or professional installation.
Common Measurement Mistakes to Avoid
Even experienced DIYers make errors that lead to misfit windows and wasted time. Here are the most frequent pitfalls:
Measuring the sash instead of the frame opening. The old window’s glass or sash dimensions don’t reflect the opening size. Always measure jamb-to-jamb inside the frame.
Rounding up instead of down. Manufacturers need the smallest measurement to ensure fit. Rounding up guarantees a window that won’t install.
Forgetting to measure depth. Width and height are useless if the new unit doesn’t fit the wall thickness. Always capture all three dimensions.
Assuming all windows are the same size. Even in tract homes, settling and repairs cause variation. Measure every window individually and label each with its location (e.g., “Master BR left” or “Kitchen above sink”).
Ignoring out-of-square frames. Use a level or square to check corners. If a frame is more than 1/4 inch out of square, the opening may need reframing before a replacement window will operate smoothly. Experts featured on This Old House often emphasize checking square before ordering, especially in homes older than 50 years.
Not accounting for obstructions. HVAC vents, electrical outlets, or plumbing near the window can interfere with certain window styles (like casements that swing inward). Measure clearances and note them when selecting replacement types.
Skipping the exterior check. Rotted sills, damaged brick mold, or failing flashing won’t be visible from inside. Inspect the exterior before ordering to identify repairs that must happen before installation.
Conclusion
Measuring a window for replacement isn’t complicated, but it demands precision and patience. Taking width, height, and depth at multiple points, and always using the smallest dimension, ensures a proper fit and smooth installation. Double-check every number, label each window clearly, and don’t skip the exterior inspection. With accurate measurements in hand, ordering the right replacement window becomes straightforward, and the installation moves ahead without costly surprises or delays.