A miter saw sitting on a makeshift bench or the garage floor isn’t just inconvenient, it’s inaccurate and dangerous. Long boards sag without support, measurements drift, and blades bind when cuts aren’t level. A dedicated miter saw station changes everything. It turns a portable saw into a precision cutting center with proper support, storage, and workflow that makes trimwork, framing, and furniture projects faster and cleaner. Whether working in a two-car garage or a basement shop, a well-designed station maximizes the saw’s potential while reclaiming wasted space. Here’s how to build or choose the right setup.
Table of Contents
ToggleKey Takeaways
- A dedicated miter saw station eliminates inaccuracy and safety hazards by providing level support, proper working height (34–36 inches), and stable mounting for consistent, square cuts on long boards.
- Support wings extending at least 48 inches on each side of the blade create a continuous work surface for handling standard 8-foot lumber without sagging or binding.
- Built-in storage drawers, pegboard racks, and drop chutes integrated into your miter saw station keep tools and accessories within arm’s reach while keeping the workspace clean and clutter-free.
- A DIY miter saw station costs $100–$250 in materials and can be completed in a weekend with intermediate carpentry skills, offering far better customization and functionality than pre-built stands.
- A T-track fence system with measuring tape enables repeatable, foolproof production cuts across multiple boards without the need to re-mark each piece.
- Test cuts on scrap lumber and verification that the wing surfaces are perfectly coplanar (using a straightedge and level) ensure your miter saw station delivers precise results on every project.
What Is a Miter Saw Station and Why You Need One
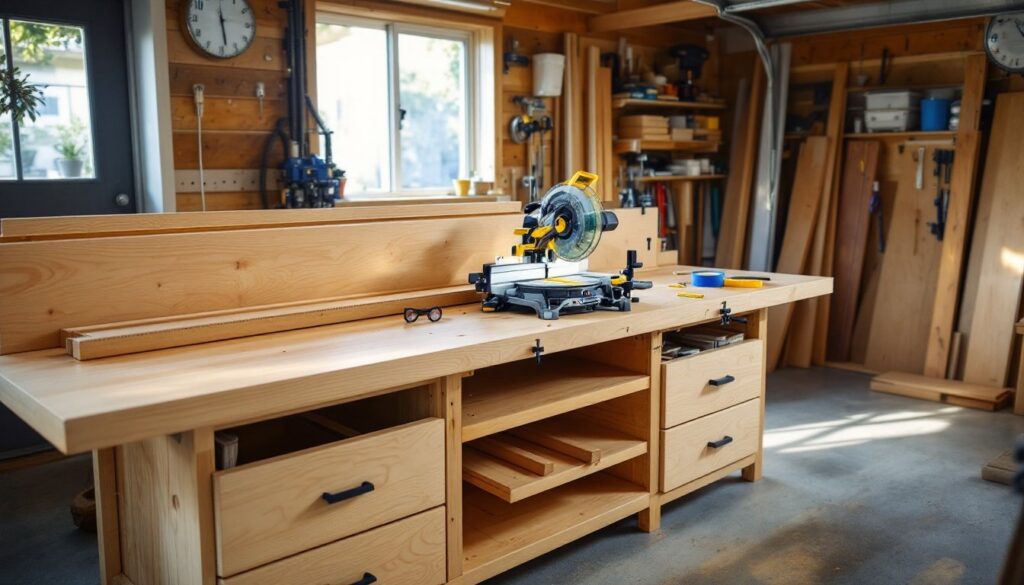
A miter saw station is a dedicated workbench designed specifically to mount and support a miter saw, with integrated wing tables or extension supports that hold long stock level during crosscuts. Unlike a standard workbench, the station provides consistent cutting height across the entire work surface, critical when cutting crown molding, baseboard, or 8-foot fence pickets.
The station solves three major problems. First, support and accuracy: without level outfeed and infeed support, boards tip or bow mid-cut, ruining square cuts and wasting material. Second, safety: a saw bolted to a stable platform at the correct working height (typically 34–36 inches) reduces kickback risk and operator fatigue. Third, efficiency: integrated storage for stop blocks, tape measures, clamps, and offcut bins keeps everything within arm’s reach.
Most stations include a fence system that extends beyond the saw table, allowing repeatable measurements without re-marking each board. Add a flip-stop or measured tape, and production cuts, like cutting 40 studs to the same length, become almost foolproof. For anyone framing walls, installing trim, or building furniture, a miter saw station isn’t a luxury. It’s the difference between fighting your tools and letting them work for you.
Essential Features Every Miter Saw Station Should Have
Built-In Support Wings and Extension Tables
Support wings are horizontal surfaces flanking the miter saw, set at the exact same height as the saw’s base table. This creates a continuous work surface that supports boards up to 10 or 12 feet without sagging. Ideally, each wing extends at least 48 inches from the blade, enough to handle standard 8-foot lumber with room to spare.
The wings should be made from ¾-inch plywood or MDF with a smooth, flat surface. Warp or twist here translates directly into angled cuts. Some builders add a sacrificial hardboard top layer that can be replaced when it gets chewed up by through-cuts. For maximum versatility, make wings adjustable or removable using bolts and T-track, so the station can fold down or slide against a wall when not in use.
A T-track fence across all three surfaces (left wing, saw table, right wing) locks down stop blocks and holds auxiliary fences for specialty cuts. This is where many free DIY furniture plans include clever hinge or slide mechanisms to save floor space in compact shops.
Storage Solutions for Tools and Accessories
A miter saw station without storage is just an expensive table. Smart designs include pull-out drawers beneath the saw for blades, hex keys, push sticks, and a shop vacuum hose. Shallow drawers (3–4 inches deep) work best for small parts: deeper ones (6–8 inches) hold clamps and marking tools.
Vertical tool racks on the side or back of the station keep squares, levels, and tape measures visible and grabbable. Many builders add a pegboard backer or French cleat system for hanging speed squares, hearing protection, and safety glasses. Keep frequently used items, pencils, blade wrenches, a combination square, in a magnetic strip or shallow tray mounted to the fence.
For offcuts and scrap, a drop bin or hinged chute below the saw table funnels waste into a rolling cart or trash can. This keeps the deck clear and prevents tripping hazards. Long-term storage for full sheets of plywood or extra lumber can be integrated below the wings using horizontal racks or vertical dividers, depending on shop layout.
DIY vs. Pre-Built Miter Saw Stations: Which Is Right for You?
Pre-built miter saw stands (like those from DeWalt or Bosch) offer portability and speed. They fold up, fit in a truck bed, and set up in under a minute, ideal for contractors moving between job sites. Most include extendable support arms and universal mounting brackets. The downside: they’re not optimized for stationary shop use. Support arms are narrow, storage is minimal, and height adjustments can drift over time. Expect to spend $150–$400 depending on weight capacity and brand.
DIY stations take more time up front but deliver a custom fit. Builders can match the station height to their own comfort, extend wings as far as the shop allows, and integrate features like dust collection, electrical outlets, and tool storage that no off-the-shelf unit includes. Material cost for a solid DIY station typically runs $100–$250 in lumber, hardware, and fasteners, cheaper than many portable stands, with far better functionality.
Skill level matters. A basic DIY station requires intermediate carpentry skills: accurate cuts, drilling pilot holes, and assembling square frames. Builders comfortable with a circular saw, drill, and level can complete a functional station in a weekend. For those new to woodworking, many woodworking project plans offer cut lists, material specs, and photo-documented builds.
The decision often comes down to shop permanence. Renters or those working in shared spaces benefit from portable stands. Homeowners with a dedicated garage or basement shop get far more value from a built-in, customized station that grows with their tool collection.
Step-by-Step Guide to Building Your Own Miter Saw Station
Materials and Tools:
- Two sheets of ¾-inch plywood (one for the frame, one for tops and shelves)
- Eight 2×4 studs (8 feet long) for the frame structure
- 2½-inch pocket hole screws and wood glue
- ¼-inch bolts (four, with washers and nuts) to mount the saw
- Drawer slides (two pairs, 16-inch soft-close recommended)
- T-track (8 feet total) and compatible hold-down clamps
- Table saw or circular saw, drill with bits, pocket hole jig, level, tape measure, square, and hearing and eye protection
Step 1: Build the Base Frame
Cut four 2×4 legs to 33 inches (this accounts for a ¾-inch top, bringing final height to roughly 34 inches, adjust to personal preference). Cut front, back, and side rails from 2×4s using pocket holes and glue to join corners. Add a center support rail down the middle for rigidity. The frame footprint should allow the miter saw to sit centered, with at least 48 inches of wing space on each side.
Level the frame on the shop floor using shims if needed. Fasten to wall studs with 3-inch lag screws if building a permanent station, this prevents tipping when cutting heavy stock.
Step 2: Install the Miter Saw Platform
Cut a base platform from ¾-inch plywood to fit snugly within the frame. This platform should sit slightly recessed (about ½ inch below the top surface of the wings) so that when the miter saw is bolted down, its table is flush with the wing surfaces. Drill mounting holes matching your saw’s base, and secure using ¼-inch bolts with washers underneath to prevent crushing the plywood.
Always wear safety glasses and hearing protection when operating the saw. Test the saw for wobble before proceeding.
Step 3: Attach Support Wings
Cut two wing tops from ¾-inch plywood, each at least 24 inches deep and 48 inches wide. Rip-cut them to the same depth as your saw table for a seamless work surface. Attach wings to the frame using glue and 1¼-inch screws from underneath. Use a long straightedge and level across all three surfaces (left wing, saw table, right wing) to confirm they’re perfectly coplanar. Even a 1/16-inch difference will throw off cuts on long boards.
Some step-by-step DIY tutorials recommend adding a laminate or hardboard top layer to the wings for smoother sliding and easier replacement when scarred.
Step 4: Add Fence and T-Track
Rip a 1×4 or 1×6 hardwood fence to run the full length of the station. Mount it to the back edge of the wings and saw table, parallel to the blade, using screws driven from underneath. Embed a length of T-track into the fence face or top surface, allowing stop blocks and clamps to slide and lock at any position. Alternatively, surface-mount the T-track if embedding requires a router and too much setup.
Calibrate the fence square to the blade using a framing square, and add measuring tape along the fence for quick reference cuts.
Step 5: Install Drawers and Storage
Build two shallow drawers using ½-inch plywood for sides and ¼-inch plywood or hardboard for bottoms. Attach 16-inch soft-close slides to the inside of the frame, positioning drawers beneath the wings where they won’t interfere with the saw motor. Use these for blades, Allen keys, push sticks, pencils, and safety gear.
Add a drop chute below the saw by cutting a rectangular hole in the platform and framing it with 1×2 strips. Position a rolling bin or shop vacuum underneath.
Step 6: Sand, Finish, and Test
Sand all surfaces with 120-grit sandpaper, especially the wing tops, to remove splinters and ensure smooth board gliding. Apply a coat of water-based polyurethane to protect the wood from moisture and glue drips, it dries fast and doesn’t yellow.
Run test cuts on scrap lumber, checking for square and checking that long boards don’t tip. Adjust fence alignment or shim the saw base if needed.
Conclusion
A well-built miter saw station turns a portable tool into the anchor of a functional shop. With level support wings, integrated storage, and a reliable fence system, every cut becomes faster, safer, and more accurate. Whether building from scratch or upgrading a commercial stand, the investment pays off in cleaner miters, less wasted material, and a workspace that actually works with the user instead of against them.